27 Jul Balsa Turbine Shade for the REGOLIT floor lamp
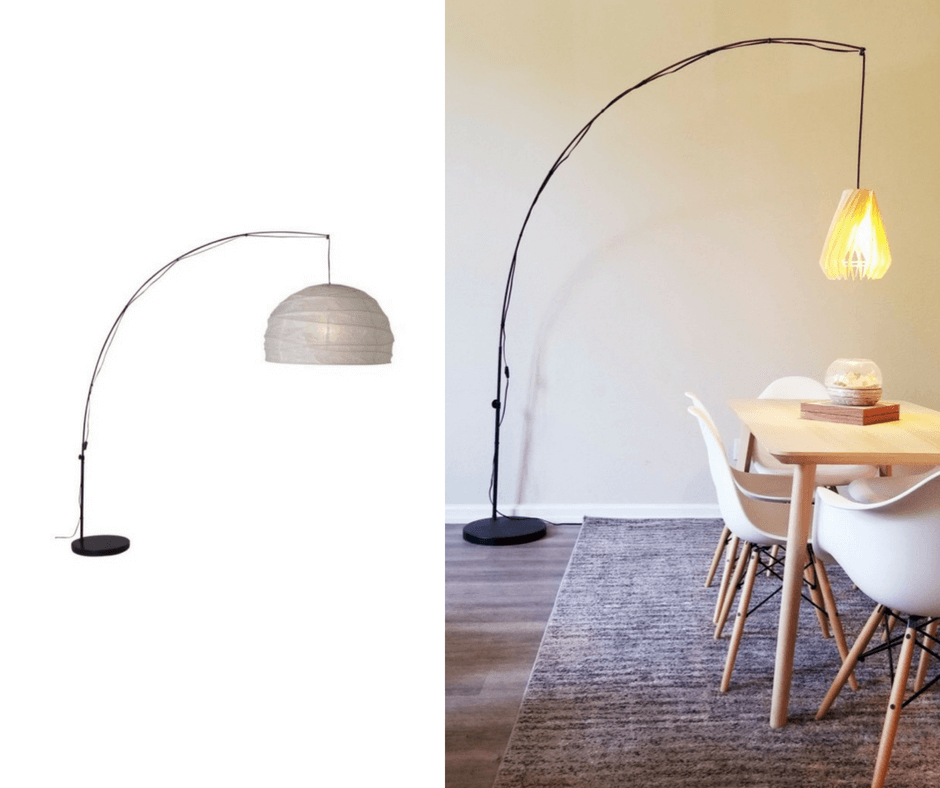
I really wanted a floor lamp that would hang a nice looking shade + bulb over my IKEA dining table. I couldn’t find any that I liked, so I bought the REGOLIT floor lamp with the intention of getting rid of its super oversized lamp shade.
It took several days to get the design down and test several different materials. Any wood lighter than balsa would have weighed down the lamp too much. The balsa was a bit expensive, I’d say not including my time it was about $40 in materials (which included some trial and error to be fair).
I like how warm the light coming off of the balsa looks.

Materials:
REGOLIT Floor Lamp
Balsa Wood sheets (1/16″)
Clear acrylic sheet (1/8″)
Laser Cutter (or you can purchase these pre-made parts online, see link at end of message)

REGOLIT Floor lamp | IKEA.com
How to hack an alternative REGOLIT floor lamp shade
I used Rhino (3d modeling software) to create a CAD model of the lampshade. The shade consists of 3 parts:
The fins
The smaller top acrylic ring (That attaches to the actual light fixture)
The larger bottom acrylic ring (That helps keep the fins together, and gives a subtle twisting effect)
In the picture showing the disassembled parts, you can see the acrylic rings have notches. These should be the same width as the material you are using.

The notches on the top ring are at a more extreme angle than the bottom ring. This is to better obscure the lightbulb at the top of the shade, and let more of the light pass through at the bottom of the shade.

I used a laser cutter to cut out the profiles of the fins in 1/16″ balsa wood sheets, as well as to cut out the acrylic rings out of 1/8″ cell cast acrylic. There are 1/8″ wide notches at the top of the fins to line up with the top acrylic ring, and notches (like little shelves) on the bottom of the fins to hold up the bottom acrylic ring.

To assemble, you first take the top ring and secure it to the REGOLIT light fixture, using the included screw-ring to keep it in place.

Then you attach a couple of fins on opposite sides of the top ring. Take care during this step as they will just be hanging their unsupported until the bottom ring comes into play.

Now place the bottom ring in between those two fins. Make sure it is aligned with the top notch. I just counted how many empty slots I had in between fins on the top ring, and made sure I left that many open between fins on the bottom ring.

Now just keep filling in the fins. It will become more stable the more fins you add.

I like to make sure the top notch lines up with the top ring before I slot the bottom notch under the bottom ring slot.


The making of the lamp took a bit of trial and error. Getting the notch sizes right took some time. Also finding the right material. I tried other woods and veneers and they were much too heavy – the lamp was literally touching the table.


I love how well it pairs with the REGOLIT floor lamp base. I feel like the scale of this shade compared to the one it comes with is more appropriate (just my opinion).


This shade is actually for sale on my website if anyone is interested, see the link here.
~ by Brian Harms
The post Balsa Turbine Shade for the REGOLIT floor lamp appeared first on IKEA Hackers.
Read more: ikeahackers.net